

Managing Contacts
Contacts in Clasp are the people and organizations you work with—clients, opposing counsel, witnesses, vendors, and other parties. Every contact can be linked to cases, assigned trust balances, invited to the client portal, and connected to billing and payment records.
What's a Contact?
A contact record stores identity and contact information for any individual or business involved in your firm's work. Contacts are matter-agnostic—you create them once and reuse them across multiple cases, communications, and financial records.
Contacts can represent:
Clients — individuals or businesses you represent
Opposing parties — counterparties in litigation or transactions
Attorneys — opposing counsel, co-counsel, or referring attorneys
Vendors and service providers — expert witnesses, court reporters, process servers
Other parties — witnesses, beneficiaries, or any person or entity relevant to your matters
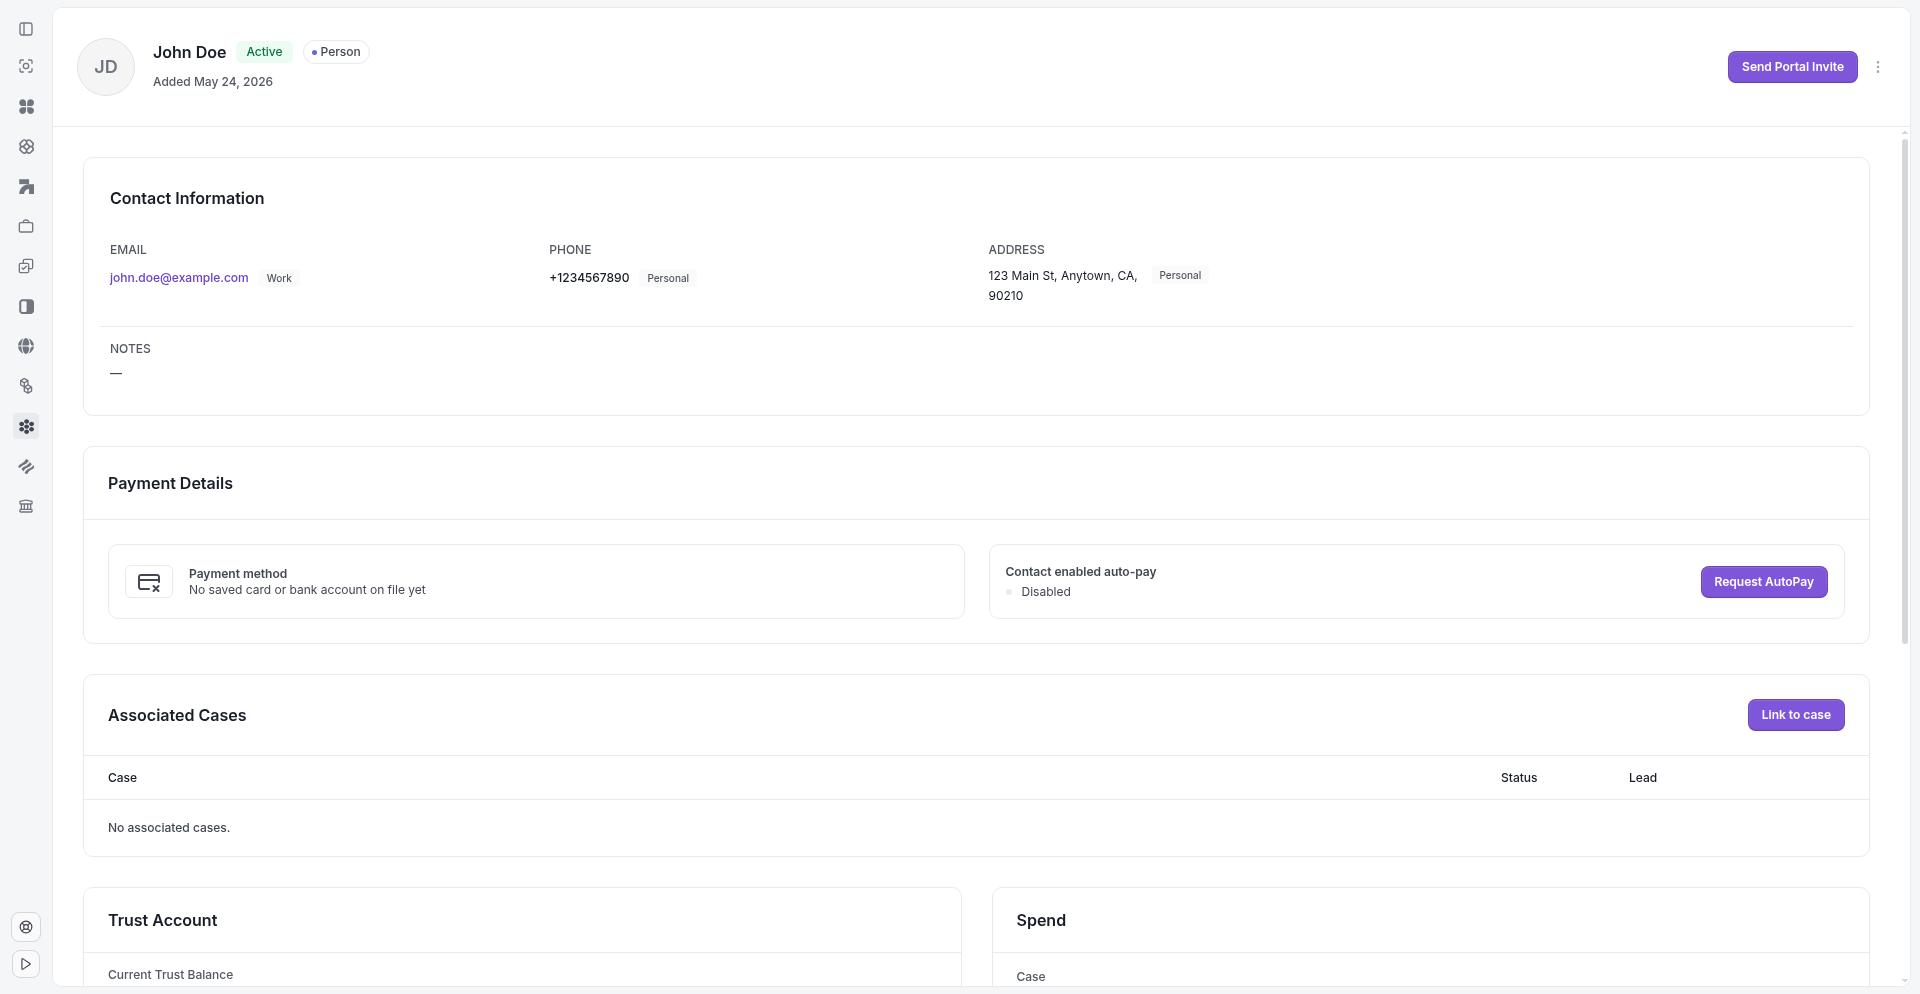
Contact Detail Page
The contact detail page shows all information about a contact, including their identity, contact information, associated cases, trust balance, and payment details.
Contact Fields
When you create or edit a contact, Clasp stores the following information:
Identity
First name — required for individual contacts
Last name — required for individual contacts
Business name — required for organizations; can be used alone or combined with individual names
Contact Information
Email — primary email address
Phone number — primary phone number
Address
Address — street address (line 1)
Address line 2 — apartment, suite, or unit number
City
State
ZIP code
Country
Notes
Use the Notes field to record internal details about the contact—preferences, relationship context, or anything your team should know.
System Fields
Clasp also tracks:
Created date — when the contact was added
Last updated — when the contact record was last modified
Archived status — whether the contact is active or archived
Creating a Contact
The contacts list page shows all your contacts with search and filter options. From here, you can create new contacts and access existing ones.
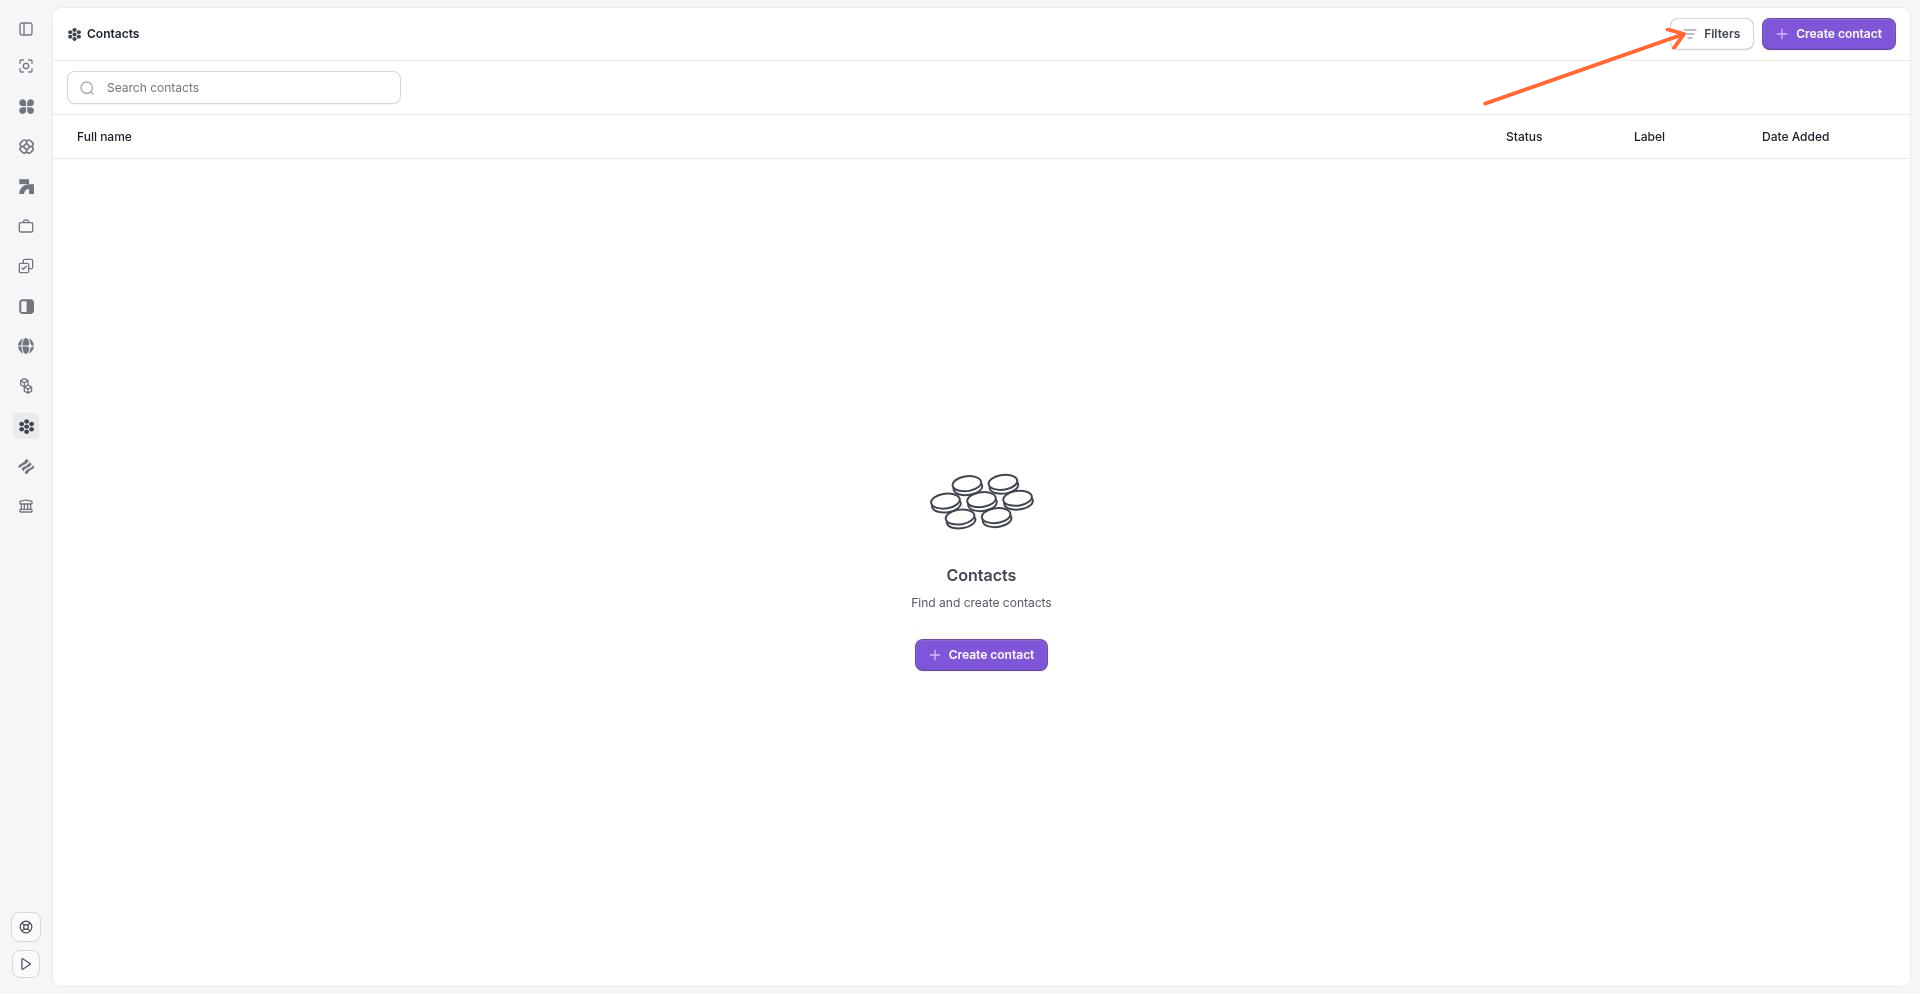
Go to Contacts from the main navigation.
Click Create contact.
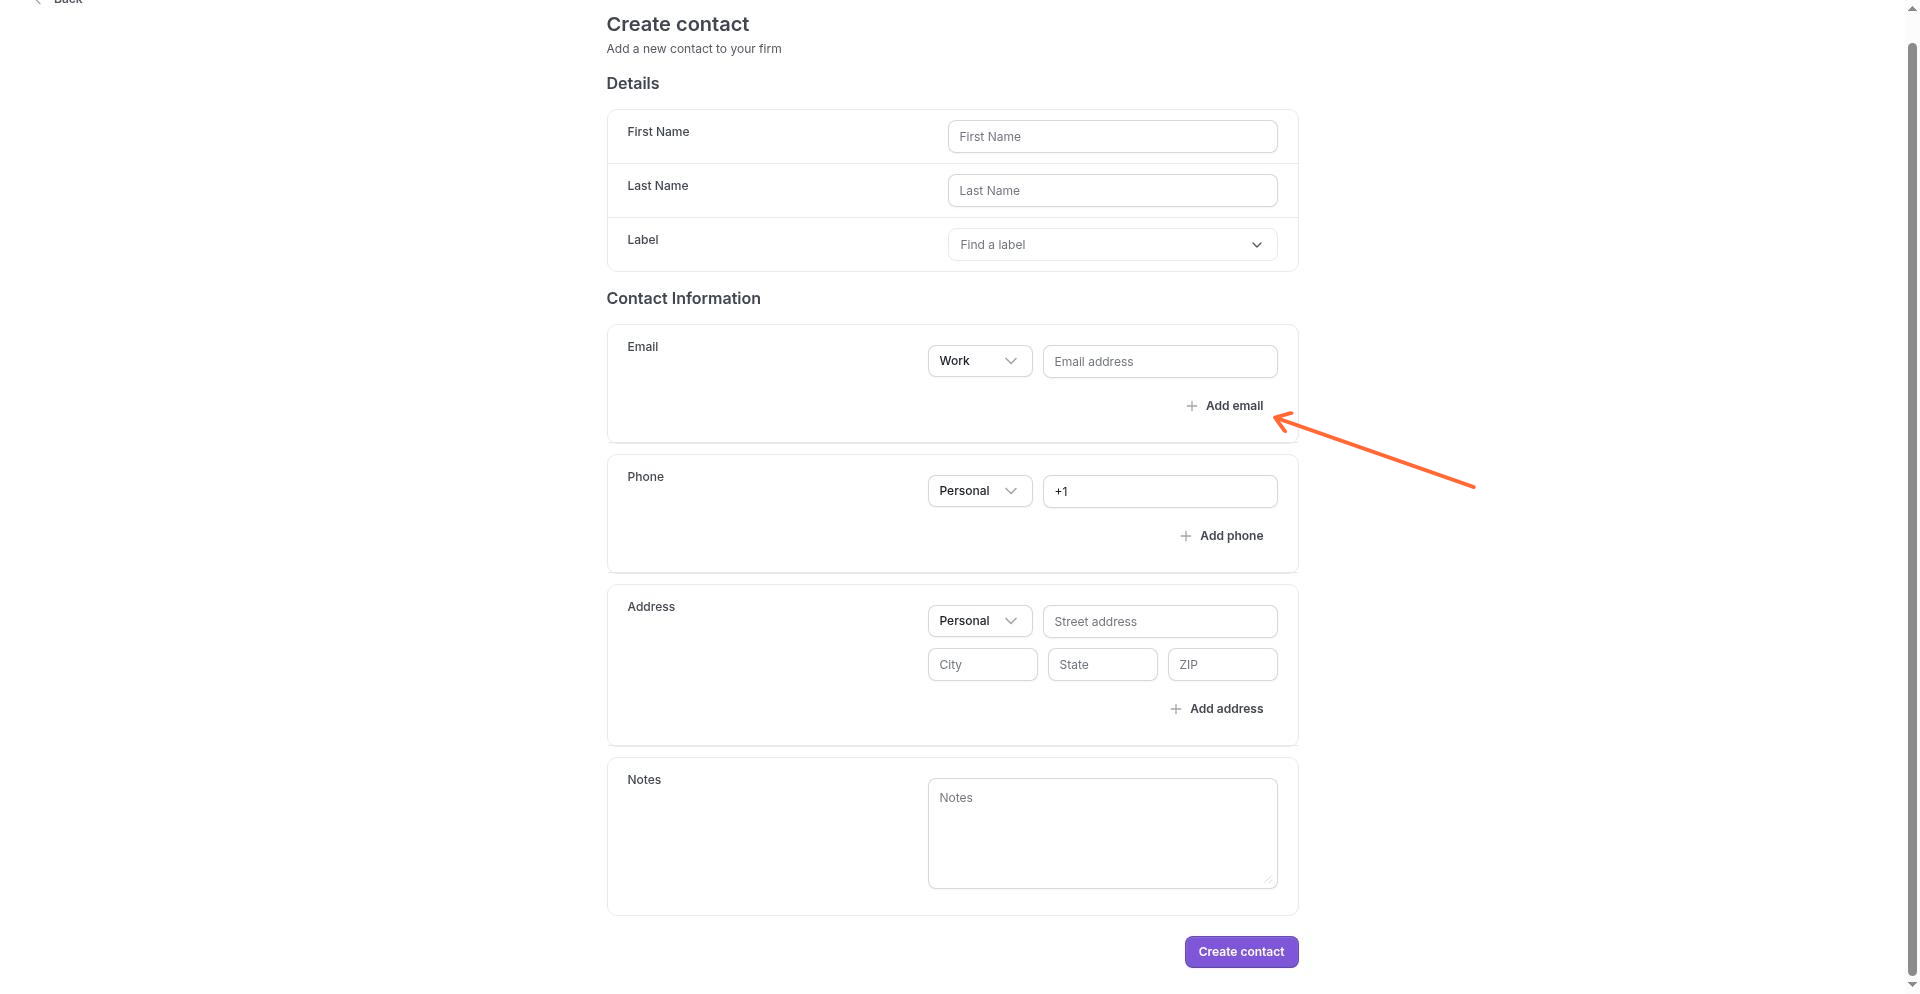
Fill in the contact's identity and contact information.
Optionally assign the contact to one or more contact groups.
Click Save.
After creation, you can edit the contact, link it to cases, and configure portal access, trust, and billing settings.
Linking Contacts to Cases
Contacts connect to cases through Associated Cases on the contact detail page. A single contact can be linked to multiple cases, and each case can have multiple linked contacts.
Contact Roles on Cases
When you link a contact to a case, you assign a role:
Primary Contact — the main client or representative for the matter. A case typically has one primary contact.
Associated Contact — any other party connected to the case—opposing counsel, witnesses, co-counsel, or additional clients.
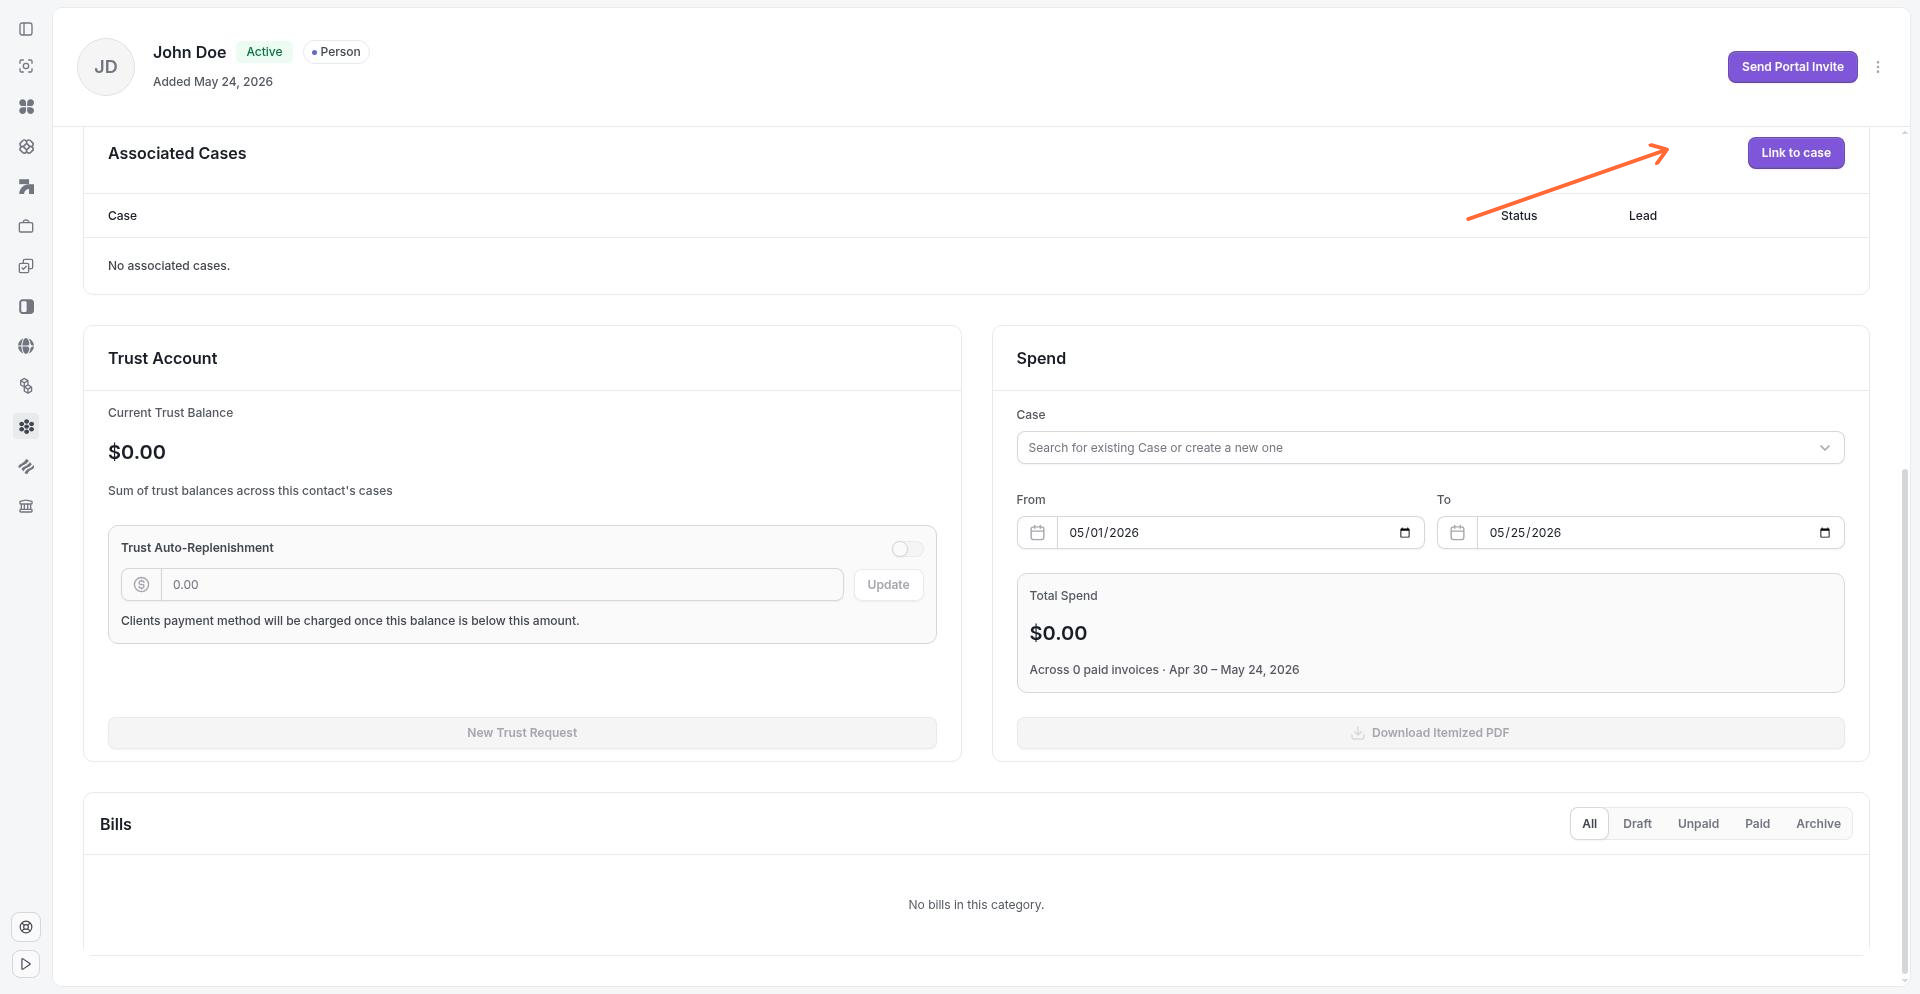
Linking a Contact to a Case
Open the contact's detail page.
In the Associated Cases section, click Link to case.

Select the case and choose the contact's role (Primary or Associated).
Confirm the link.
To unlink a contact from a case, use the unlink action next to the case in the Associated Cases list.
Trust Accounts and Contacts
Each contact can have an associated trust account balance that tracks client funds held in trust. The trust balance appears on the contact detail page under Trust Account.
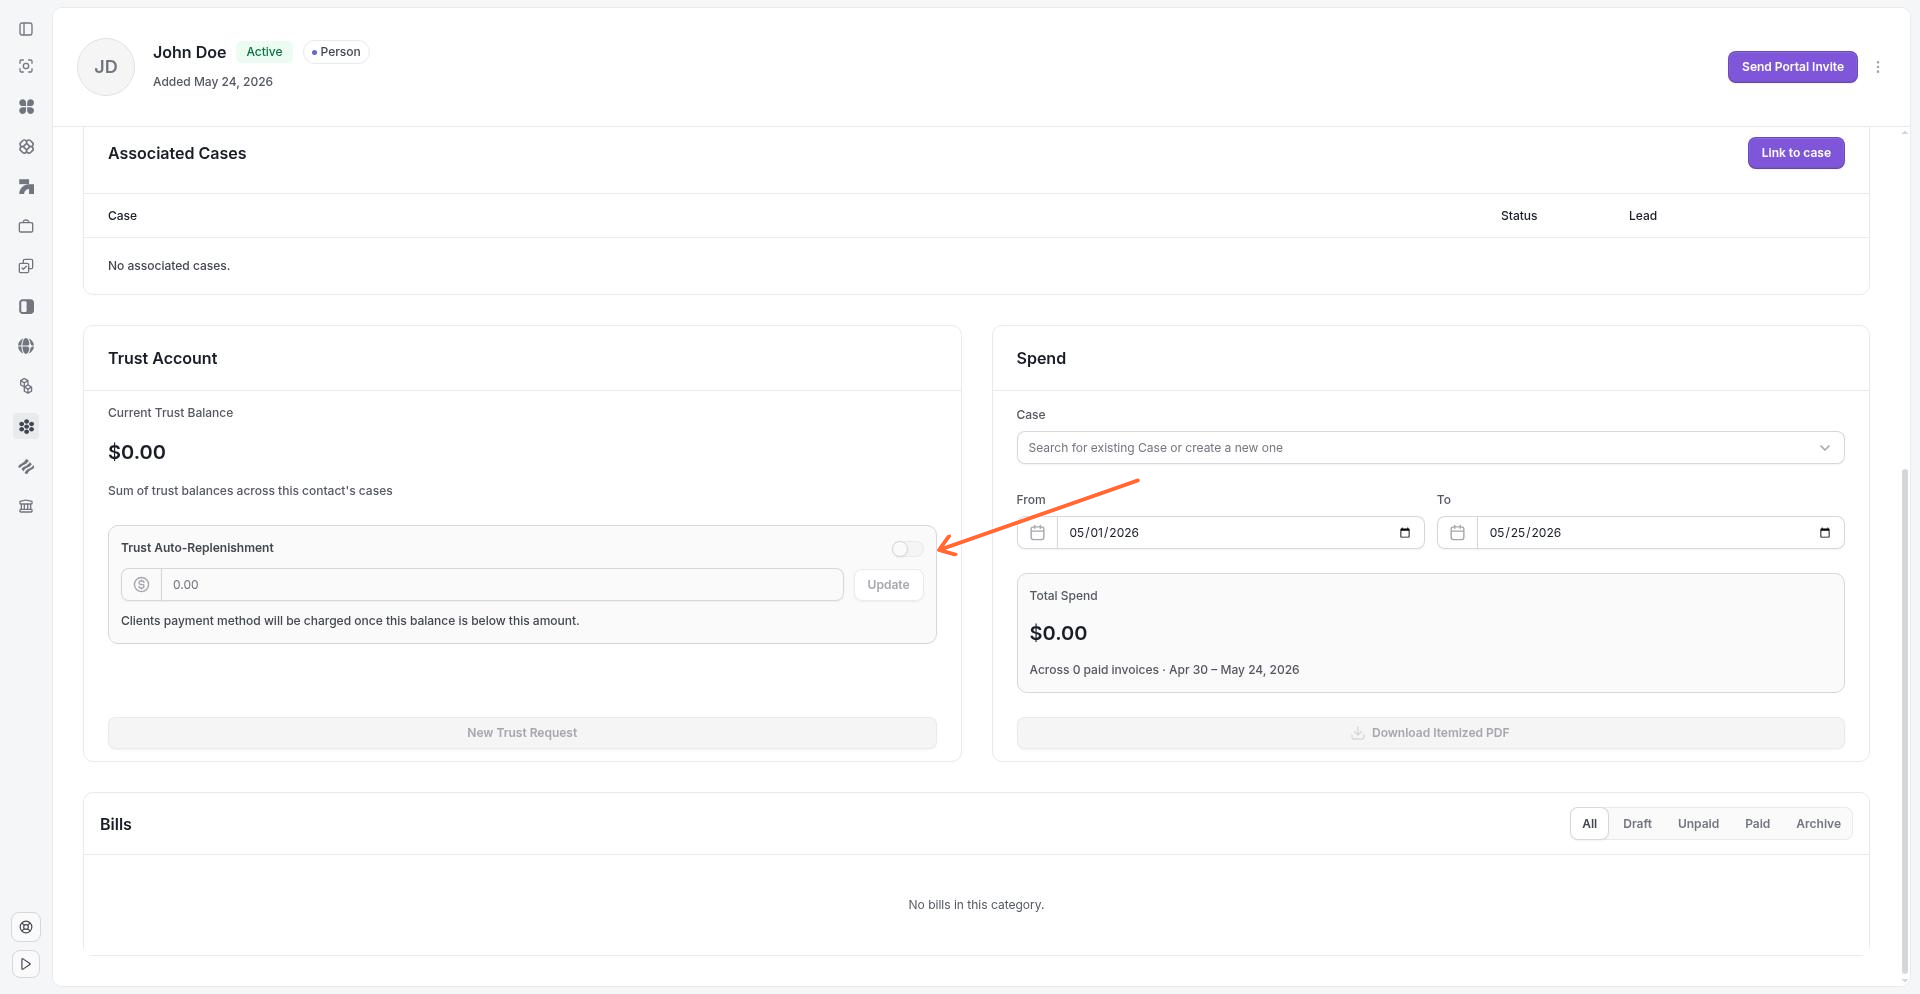
Requesting Trust Funds
To request trust funds from a client:
Open the contact's detail page.
Click New Trust Request.
Specify the amount and any instructions.
Send the request.
The client receives the request through their preferred communication channel.
Billing and Payment Details
The contact detail page includes a Payment Details section showing the contact's financial relationship with your firm.
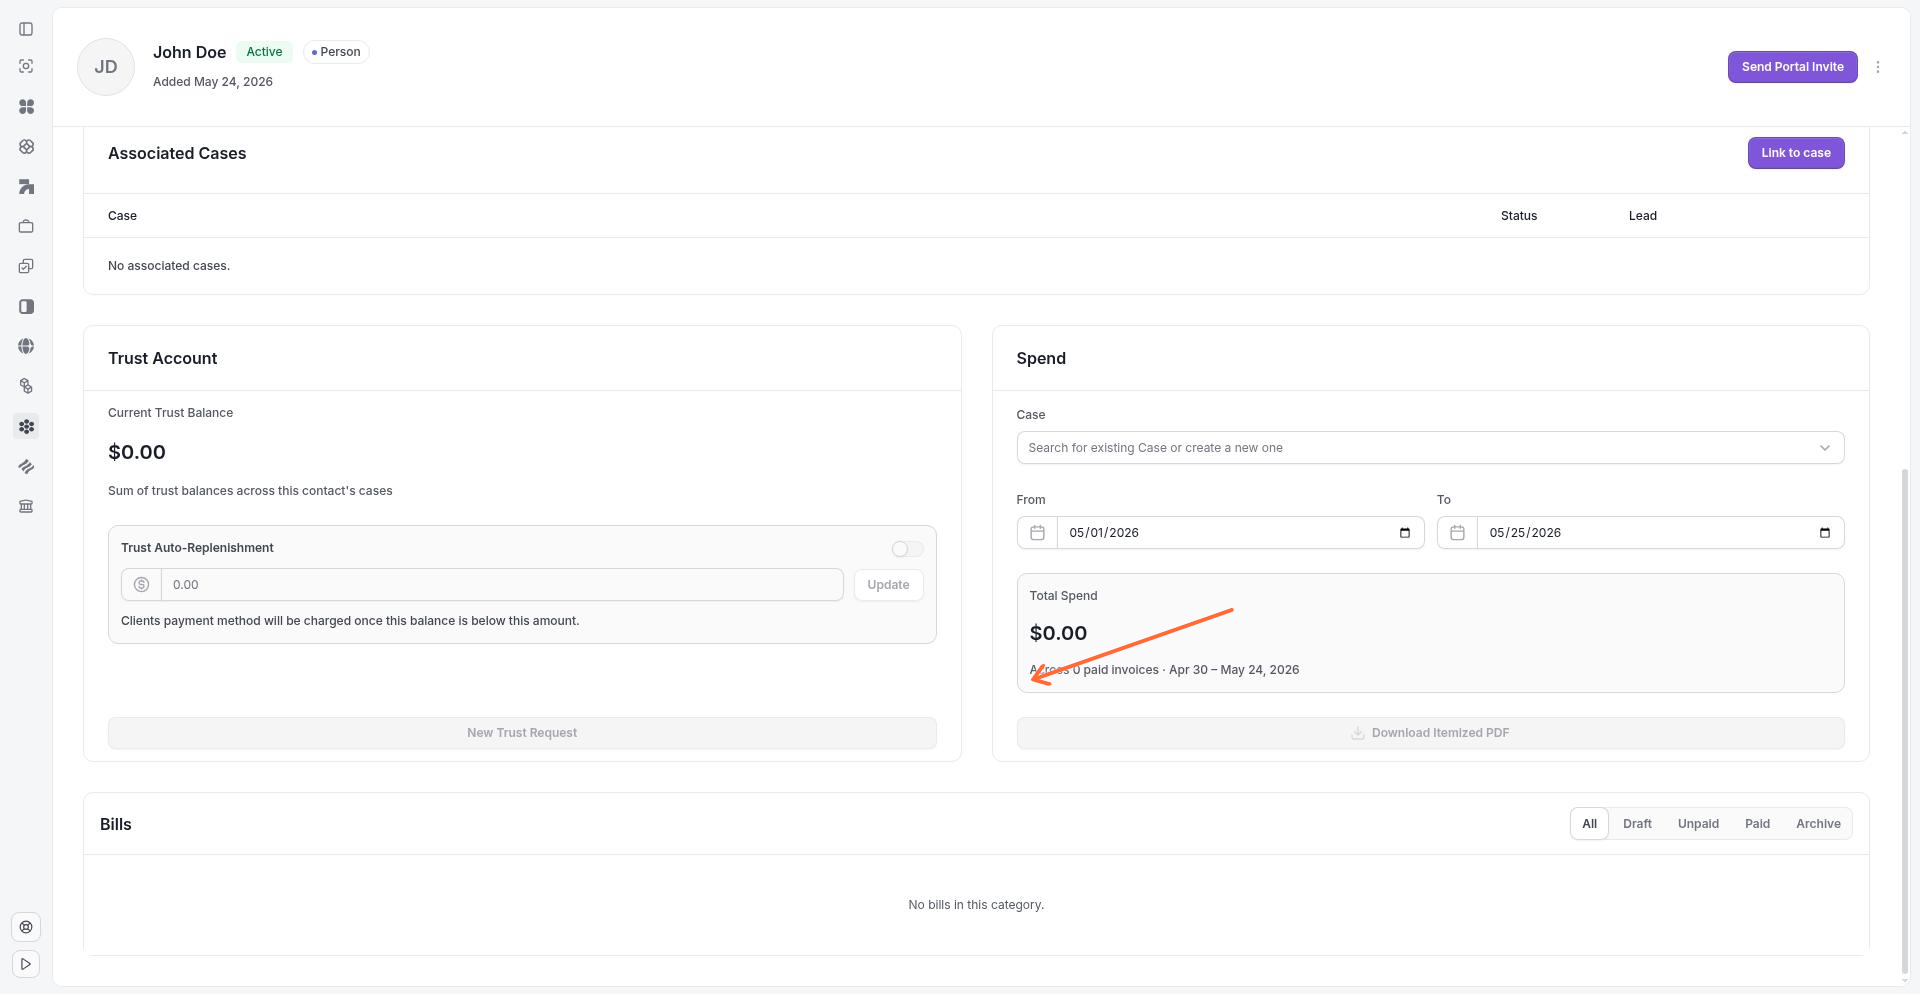
Outstanding Balance
The contact's outstanding balance reflects any unpaid invoices. This amount updates automatically as invoices are issued and payments are received.
AutoPay
You can enable AutoPay for a contact to automatically charge a stored payment method for invoices. To request AutoPay enrollment:
Open the contact's detail page.
Under Payment Details, click Request AutoPay.
The contact receives a prompt to enroll and add a payment method.
Once enrolled, Clasp automatically charges the contact's payment method when invoices become due.
Stored Payment Methods
Contacts can have stored payment methods (credit cards or bank accounts) used for AutoPay and manual payments. Payment methods are managed through the client portal or during payment flows.
Client Portal Access
Contacts with an email address can be invited to the client portal, where they can view case information, communicate securely, access documents, and manage billing.
Portal Permissions
When you invite a contact to the portal or update their access, you can set permissions for:
Messages — view and send secure messages
Calendar — view upcoming events and deadlines
Clasp Drive — access shared documents
Billing — view invoices and make payments
Signatures — receive and sign documents
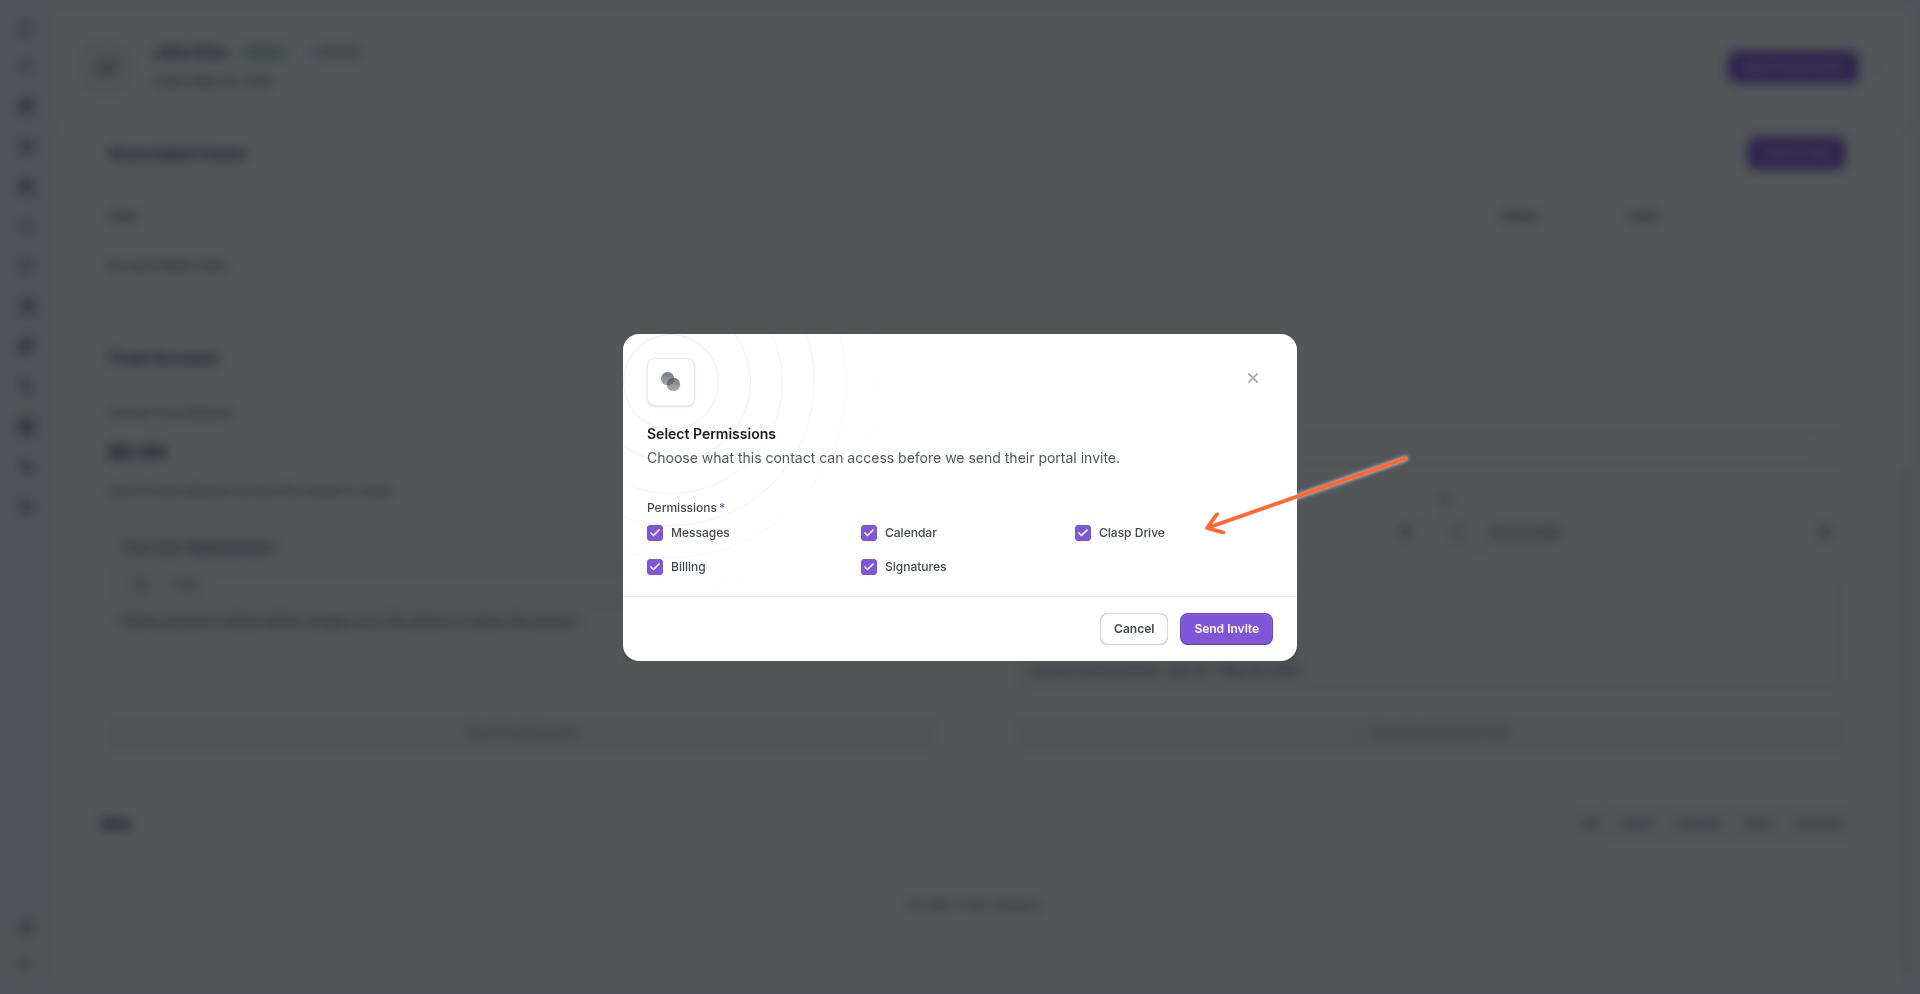
Inviting a Contact to the Portal
Open the contact's detail page.
Click Send Portal Invite.
Select the permissions to grant.
Click Send Invite.
The contact receives an email invitation to create their portal account.
Updating Portal Permissions
To change a contact's portal permissions after they've joined:
Open the contact's detail page.
Under portal access, click Select Permissions.
Adjust the permissions as needed.
Click Update to save changes.
Contact Groups
Contact groups let you organize contacts into categories—by client type, referral source, location, or any classification that fits your workflow. Groups help filter and segment your contact list for reporting, outreach, and case assignment.
To assign a contact to groups during creation or editing, use the contact group selector.
Archiving and Deleting Contacts
Archiving
Archiving a contact removes it from active lists while preserving its history and connections. Archived contacts retain their case links, trust records, and billing history.
To archive a contact:
Open the contact's detail page.
Click Archive.
To restore an archived contact, use the Unarchive action.
Deleting
Deleting a contact permanently removes it from Clasp. This action cannot be undone. Before deleting a contact, ensure it has no active case links, trust balances, or outstanding invoices.
Related Articles
Creating and managing contact groups
Trust accounting overview
Client portal setup and permissions